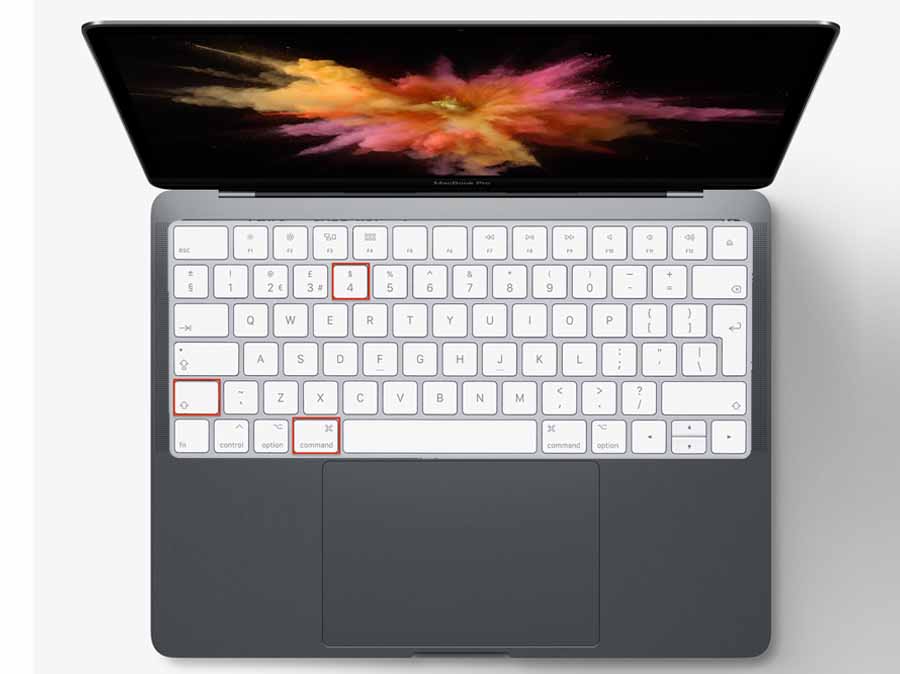
How do you screenshot on Mac or where do you go to for screenshot on Mac shortcut? On the contrary, most people find it difficult to take a screen capture on Mac, especially on Windows operating system. Actually, the methods of taking a screenshot on the mobile phone are actually different from the desktop computer. Since there is no power button and down volume to take a screenshot on the Mac or Windows. But there’s a hidden feature or shortcut keyboard on the Mac that allows you to take a screenshot of images.

Furthermore, if you need to use a regular screenshot to create a snip on your MacBook or Mac Pro. There are certain screenshots on Mac shortcuts where you can take a snip on without keyboard. Likewise, you can also take a snip through the use of a keyboard. For the windows device, you can use the snipping tool to create an image on the screen. However, for the MacBook or Mac Pro, we will show you some techniques you can use on how to screen grab on a Mac.
How to Take Screenshot on Mac Keyboard – Full Screenshot
One of the ways in which you can capture an image on your Mac devices is through the keyboard. These are considered as keyboard shortcut where you can just press keys on the keyboard to take a capture of the entire screen. Here are the following steps to take a screenshot:
- Press and hold this key together Shift, Command, and 3.
- That’s how to capture the full image screen on Mac.
However, in case you see a thumbnail located at the corner of the screen, you can then click on edit or crop the image. However, wait until the screenshot is completed and select the file to save the image on your desktop.
How to Take a Snip of a Portion of the Screen On Mac
The step above allows you to capture the full screen of the image you want to snip. However, if you just want to take a snip of just a little side of the screen. You can use another screenshot on Mac shortcut keys to take a capture of half of the screen.
- Press and hold these keys together Shift, Command, and 4.
- Then, you can drag the crosshair to narrow down the area you want to snap.
- Next, to take the shot, you can then release your mouse.
Keep in mind, you can move the selection by pressing and holding the space bar while you drag the image. If you want to cancel the snap you took, you can click Esc and you can start the process again. Likewise, you can edit or crop the screen at the top right corner of your screen.
How to Take Screenshot or Capture a Window or Menu On Mac
There is another screenshot on Mac shortcut that allows you to capture a window or menu. This screenshot is very simple, all you need to do is open the window or menu you wish to snip. Then, you can press and hold these four keys at once Shift, Command, 3 and Space bar. Afterward, the pointer will then change to a camera icon to take a snap. Next you can select Windows or Menu to take a capture of the image. However, if you want to remove the window shadow, you can press and hold the option key to remove shadows from the screenshot.
In summary, if you’re looking to find where your screenshots are located. Based on the default of the system, the name where to find a screenshot is save to your desktop file under the name of Screen Shot (date) at (time).png.” However, you can decide to change the default location where you usually save your screenshots from the Screenshot app menu.

